There are many reasons why you might choose Not to follow a Surgeons Plan contained within DaHRTs, not least that perhaps you had surgery outside the UK so neither Surgeons plan fits your needs. It is to cover this eventuality that I have provided a routine that permits you to build your Own plan.
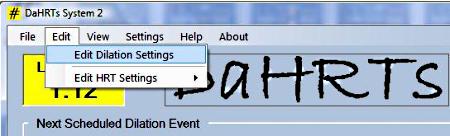
To set up Your Own -User Defined- Dilation Plan you first select the EDIT option from the Main Menu and Then navigate to ...
EDIT Dilation SETTINGS
A new window will open showing any currently selected plan - or an empty table if no plan has been selected. At the top of this window is a section showing 5 radio Buttons labelled ...
Julie C - Hills/Thomas - Bellringer - My Own - None
This Help Page will focus on the 4th of these buttons - Marked 'My Own'.

First, Click on the Button ... This will enter into the table some values which I saved when writing the program ...
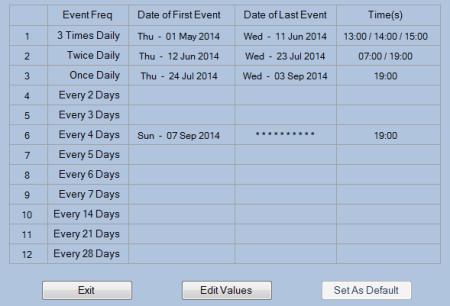
To Edit the values in this table click on the button at the bottom center of the table marked 'Edit Values'

This will open a new window ready to accept our changes ...
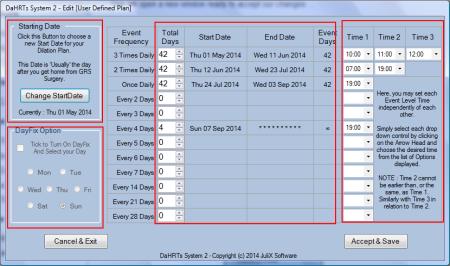
This Window is divided into 4 sections ... namely
StartDate - Durations - DayFix - Times
Starting with the StartDate Section ...
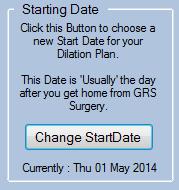
Clicking the button marked 'Change StartDate' will bring up a Calendar Control which you can use to enter a new Start Date.
Click on the Arrow-Head at the right of the selected date ...
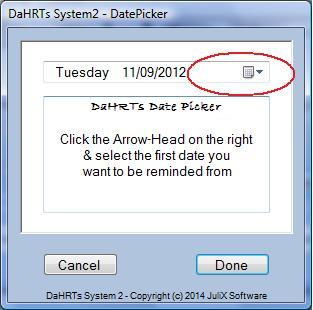
in order to open up a calendar which lets you choose a date easily ...
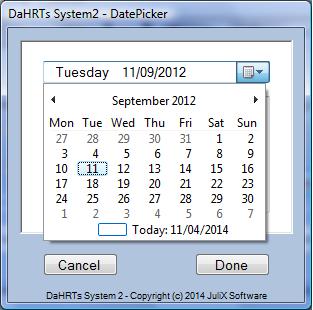
This can be any date from Jan 1st 2000 up to Dec 31st 2099. After selecting your date 'Click' on the button marked 'Done'
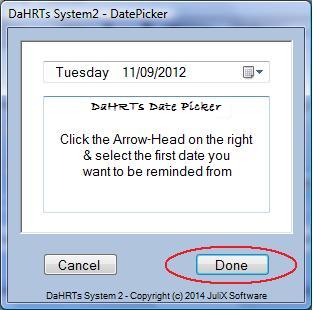
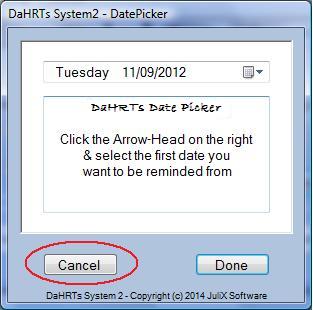
This will transfer your chosen date back into the Editing Form. If you change your mind and wish to back out of choosing a date just click on the button marked 'Cancel' ...
Moving on to the second section ...
The Main Difference between entering your own plan and selecting a Surgeon Preset is the ability to enter your own choice of Duration for each level in the table.
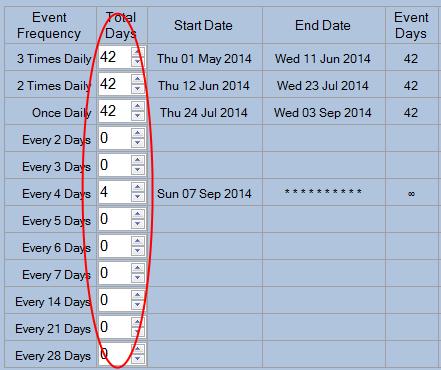
You set the duration using the spinners on the left hand side of the table. Click on the UP Arrow-head to increase the duration (and DOWN to decrease obviously) until you reach your desired duration. As you do so, the Dates in the table will change dynamically.
NOTE : You are 'Not' setting the dates with this process ... rather you are setting the durations. This is important because having arrived at a series of durations, you may choose to change the StartDate. In that instance, whilst all the dates in the table will change, the durations of each level will remain as you entered them.
The amount by which the spinners will increase or decrease depends upon which line in the table you are editing i.e. on lines 1,2 and 3 the increment value is 1 (these events all happen at least once per day) On line 5 (events happen every 3 days) the increment is 3, so on line 9 (event Frequency of 'Every 7 Days') the increment will be 7 etc ...
Next comes the 'DayFix' option. All Dilation Events which occur with a frequency of 'Once per week' onward will (obviously) always occur on the same day of the week. You can (if you wish) use the DayFix option to set this day to one of your own choosing.
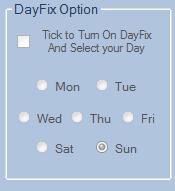
The DayFix Option box will be greyed out unless or until a value is entered into a level from line 9 onwards. This makes sense since the DayFix Option only applies to levels from line 9 on...
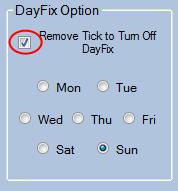
Having Ticked the DayFix Option you are now able to choose which day of the week you would prefer to Fix On
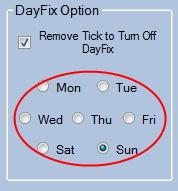
DayFix choices have no effect on Events which occur more frequently than once per week.
On now to the section dealing with Event Times
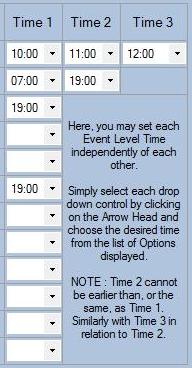
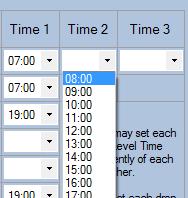
The first two lines in this section represent a special case in that events will happen on these days... more than once per day. So if you change a time on these lines all other times 'On The Same Line' will be blanked, and you will have to enter a new time into each one. Wow! that sounded complex! ... its not really, so lets try editing line 1 (3 x Daily) as an example.
First enter a time into 'Time-1' on the first line
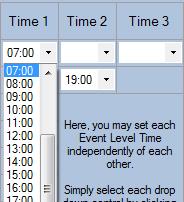
Note that the other Times on the same line are automatically 'Blanked' ...
This is to ensure that you cannot enter a time into Time-2 that is before Time-1. When you come to enter a time into the Time-2 box, the first option available will be 1 hour later than your selection in Time-1
The procedure is repeated on Time-3. Also 'Please Note' when editing the times on lines 1 and 2 the button marked 'Accept & Save' will be 'Greyed Out' (ie. not clickable) until all the times have been entered into these lines.
Lines 3 to 10 (1 x daily upto 1 x 14days) all have a drop down that lets you enter any time from Midnight (00:00) to 11pm. Should you want to, you can mix it up a bit, perhaps choosing to dilate in the morning for some levels and in the evening for others.
When you are happy with your changes, just click on the button marked 'Save & Exit'. When The form closes the previous form will re-open, here you can click on the 'Set as Default' button to make this (edited) plan into 'your' Dilation Plan.
If you get into a tangle and want to start again just click on 'Cancel & Exit', Then Click the 'Edit Values' button and start over ...
Seriously, its easier to do than it sounds, try it out and as long as you dont click the 'Save and Exit' button you can continually change things. [Even if you do 'Save and Exit' you can return to this form and Edit/Update your settings at will]
Essentially, the rule here is ... 'Try it and see' ... if it doesnt work out the way you want just 'Try it Again'